There is no excuse, you should be using HTTPS by default. Most web hosting providers give them out free of charge, via Let’s Encrypt. Some hosts still charge for the certificates, but they don’t need too, they are just money grabbing. Here are some simple steps to manually set up HTTPS instead of using plugins (further slowing down your site) I hate when people use http-to-https plugins, that’s just pure lazy.
STEP 1 – Install SSL certificate
Either you do this on your own from cPanel or get free shared SSL from CloudFlare.
- Can’t do it yourself? Ask your web host, or myself here.
- SSL’s are free now! – thanks to LetsEncrypt. Don’t let anyone fool you into thinking you need to pay for it!
STEP 2 – Change WordPress URL to HTTPS
Go to your WordPress settings and change the website address and site address to HTTPS.
STEP 3 – Update your database URL’s
This is the part where most people either get lazy or don’t know how to do it. They’ll use a plugin like some “Really Simple SSL” that forces HTTPS. I HATE THIS – don’t install another plugin just for this basic function!
The best way is to do it manually from your database so that all your asset URL’s and internal links use native HTTPS instead of wasting server resources to reload the links in HTTPS.
How to update your database URL’s manually:
- Install Better Search Replace
- Back up your database, just to be safe.
- Enter “http:” in the search for field and “https:” in the replace with field. Please write it exactly as I say, otherwise, if you put only “http” and not “https:”, you risk cocking up all the entries that already have “https”.
- Select all the database tables.
- Select Replace GUIDs
- Then press the Run Search/Replace Button
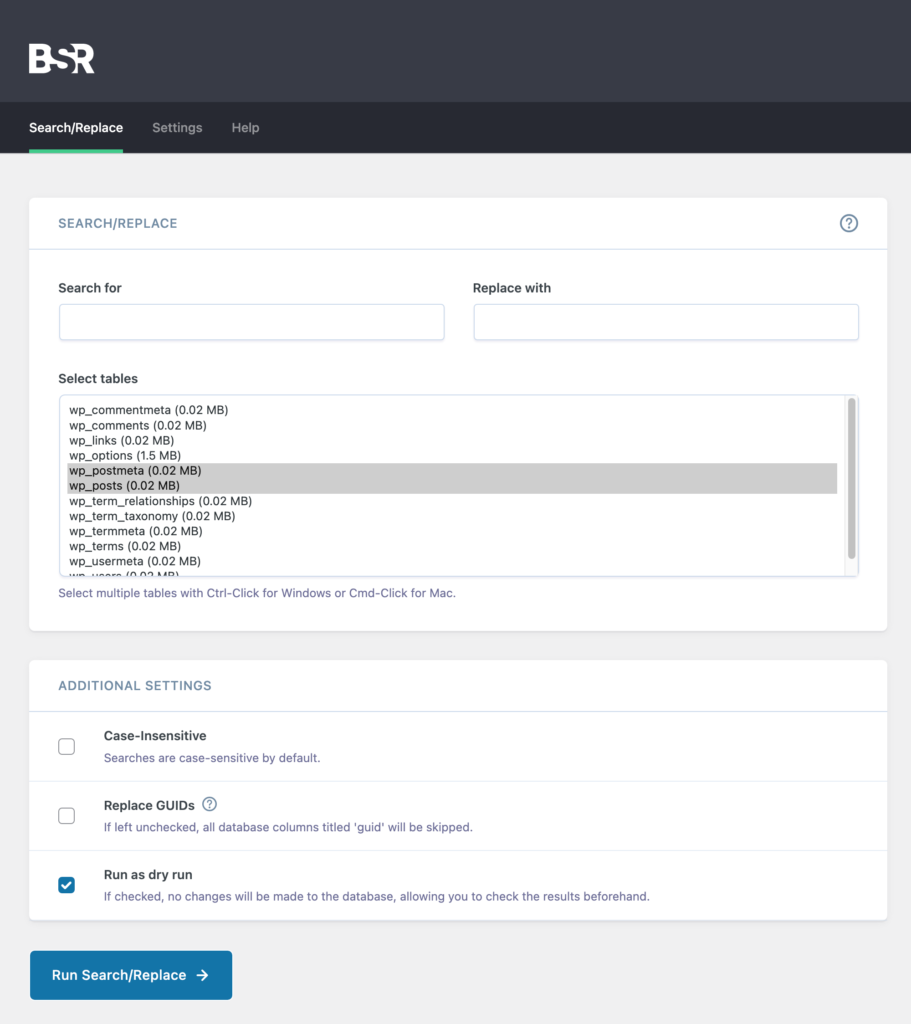
Honestly, editing database URL’s manually is very easy to do, but also very easy to completely F**k up your site if you don’t know what you’re doing. Please be careful and make backups.
STEP 4 – Update Google Search Console
Update your website settings in Google Search Console and also Google Analytics to use your new HTTPS address!
STEP 5 – Apply redirect in your htaccess file
This is the last step. Put this code below in your htaccess file. Now You’re done!
(This step is only done if you’re on an Apache Web Server)
					RewriteEngine On
RewriteCond %{HTTPS} off
RewriteRule (.*) https://%{HTTP_HOST}%{REQUEST_URI}
Resolve any problems (if needed)
Everything should be working. But just in case, here are a few diagnostic steps you can do if not.
- whynopadlock.com – Check here, and it will tell why you’re not getting a full HTTPS status.
